Male Modular Base-Mesh out of a Set of two Base-Meshes I have to make for a modular character project; Female is next. The body parts must be replaceable in run-time, editing UVs and blending seams in cases like this is always a pain, specially for skin materials with normal mapping.
I have developed a new plugin for Unreal Engine which will be released soon*
This component based system considerably improves frame-rates when dealing with massive spawn/destroy actions performed on actors such as bullets.
You can read more about it here:
Well, some out there might know I am big fan of Unity no more…
Still, close friend of mine have requested more than once for me to revamp this little tool I’ve created 3 years ago, UDN Notepad; So then finally I went over there and did it for him.
It is basically a Unity plugin which adds built-in game design tools to the development environment, a tiny little design suite where developers can write their game’s story without leaving Unity Editor for other text processors that aren’t much game development centric. UDN is a little different because it forces the story writer to follow a programmer mindset from the get go, writers have to think about Game’s chapters, events, key events, dialogs and follow this pattern or else they simply go nowhere trying to write the story.
One good thing about Unity, when compared to other game engines, is that its Editor API is very small and never change too much; it took me less than half an hour to port the original code from Unity 3 to the actual Unity 5.5 although I did write this thing over 3 years ago and remember absolutely nothing about what I was doing when developing this plugin back then.
So now they can use UDN to write their little fantasy story and later quickly attach the resulting dialogs and chapter narratives to their Dialog System without much headaches while avoiding to pay for some commercial solutions like that Articy overpriced stuff yay!
For obvious reasons, UDN is capable of exporting all documents to RTF format which can then be opened on all the Windows, Linux or Mac platforms where you might have any text processor software capable of reading *.rtf files to distribute or print whenever needed.
Next step to help them a little more will be expanding this thing with hyperlink-able Character Database and Item Databases that may be converted to actual in-game objects, but that part is probably on them since my free time is always short, we shall see…
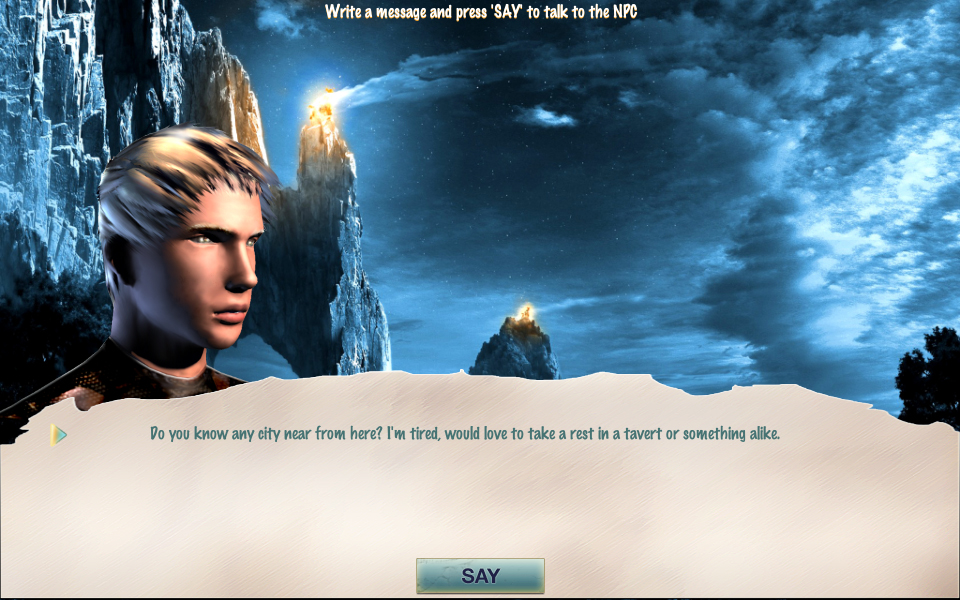
I will in this post explain a bit the general usage of the UFSM Plugin and how to use it for your advantage when developing complex character behaviors for your UE4 game projects.
For this guide, we will focus on control inputs and how to encapsulate them inside FSM States to easily achieve different movement modes for our pawn.
The character at the end of this process shall be able to respond input commands by walking, running, jumping, double jumping, climbing a ladder; or ignore all inputs:
Very well, let’s begin…
Installing the UFSM Plugin:
In order to achieve what is accomplish in this tutorial, you have to have access to the UFSM Plugin which you find at Gumroad, or at UE4 Marketplace on a later date when released.
The reason why this plugin is needed is because UE4 has Finite State Machine system available only for the Animation System, but not for programming; Blueprint environment wasn’t really designed with the necessary tools to help you accomplish a proper Finite State Machine system by itself, so a bit of customization via C++ code was needed thus the existence of UFSM, which is a robust C++ component designed to fulfill our requirements.
Before proceeding with installation, let’s keep in mind first two important notes:
1# UE4 can’t compile plugins if your project is pure Blueprint project. I will explain how to convert the project if that is your case. 2# If your project is Blueprint only, you have to convert the project before you add a Plugins folder with code to the project.
So, let’s begin by creating a new project, using the 3rd Person template as a basis:
It comes with the character we need and input configuration out of the box so in this case it’s a good place to start.
After creating the project and UE4 finish loading… Close the Editor and let’s open the project folder.
Copy and extract the downloaded UFSM Plugin inside the project folder (this is not needed if you install plugins from the Marketplace):
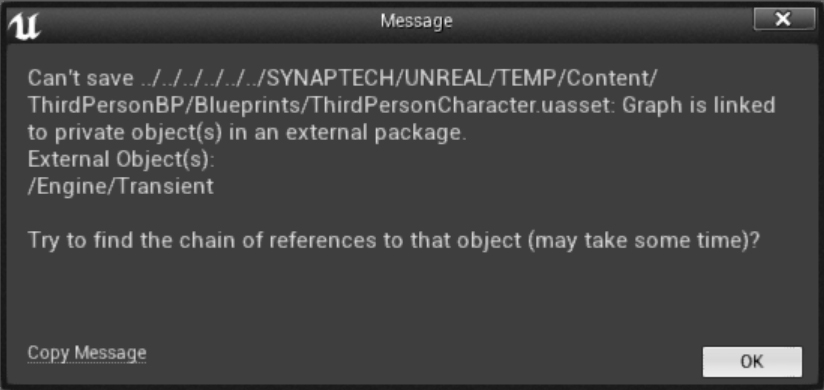
After extracting, if you try to open the Editor you may see an error message like this:
It means your project is Blueprint only and it has no configuration setup to access and compile C++ source files, which is needed to install code plugins that are not pre-compiled and/or shares C++ source.
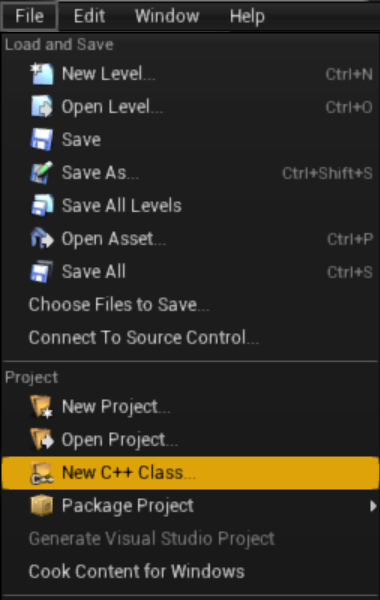
To fix this, delete the “Plugins” folder which was created, removing all source files… Then open the Editor again and after it loads, create an empty C++ class just to make the Editor configure C++ compiler for your project:
After you’ve created your class, Editor will launch C++ compiler and open Visual Studio for you; now your project is a C++ compatible project.
After loading of Visual Studio is complete… Close it, we don’t need it here. Let’s close again the Editor as well.
Go back to the project folder, extract again the UFSM Plugin to the folder, right click the project file hit “Generate Visual Studio project files”:
Now left click the project file to open it; You now should see this, click “Yes” and Editor will use VS C++ compiler to build the UFSM Plugin for you:
After compilation is done, Editor will launch your project with the new UFSM Plugin installed.
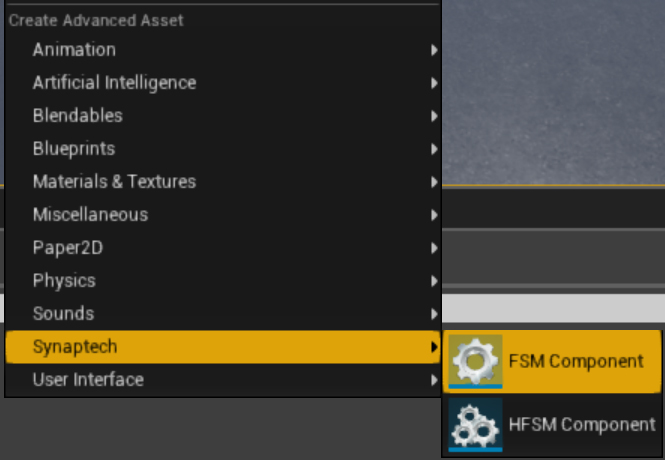
If you right click Content Browser, you will see a new section in the popup menu of (fancy) name “Synaptech”. In that menu you can see buttons to create FSM classes for your project:
And the plugin is installed successfully, read for you to use!
Creating a Finite State Machine Component:
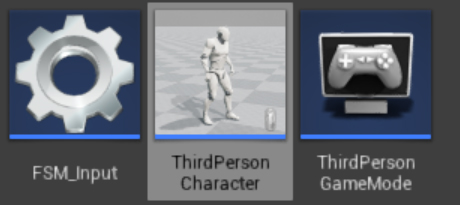
Let’s right click Content Browser, ‘Synaptech -> FSM Component’, to create an FSM. Let’s name it “FSM_Input” for easy identification of the new created asset.
Most of our logic for player inputs and character responses will be processed inside this component:
Double click FSM_Input, Blueprint graph for your new component will popup.
At the Blueprint graph toolbar section, check the “Class Defaults” button; In Details Panel now you shall see ‘FSM’, ‘Activation’ and ‘Events’ sections.
Make sure that “Auto Activate” box is checked:
That is because if an FSM Component is not active, it will not ‘Tick’. And we want this one to tick since it will process all of our player input logic for us.
You can also enable/disable FSM Components and tell one another who disabled who to transition between independent FSMs, but that is a topic out of the focus here.
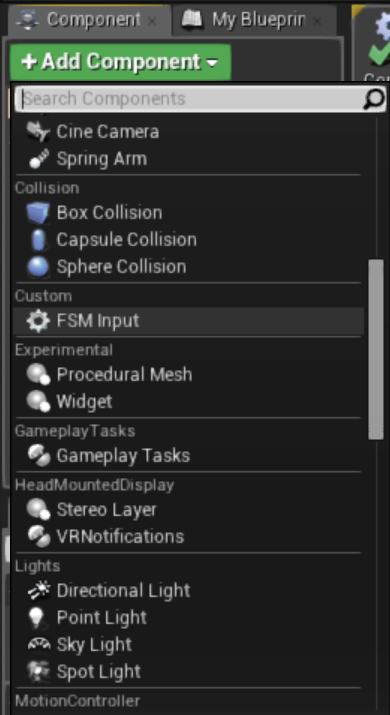
Now our FSM Component is marked active, let’s also open our Character Blueprint and add to it our newly created component, FSM_Input (under the ‘Custom’ section):
Programming our FSM:
Now that our character has the FSM Component attached, before we proceed, there’s an important note about Blueprint owners and Blueprint Components to keep in mind:
Note: If you see a message like this, while trying to save a Blueprint:
It means your FSM Component Blueprint must be fixed before you save the Blueprint which owns it as a Component attached.
To fix it do the following:
1# Compile the FSM Component Blueprint, and save it. 2# Compile the owner Blueprint, in this case our Character Blueprint, then save it. 3# Now you can freely save your Map.
So, back to the Blueprint programming, let’s delete our FSM_Input’s Begin Play and Tick functions because here we won’t need them:
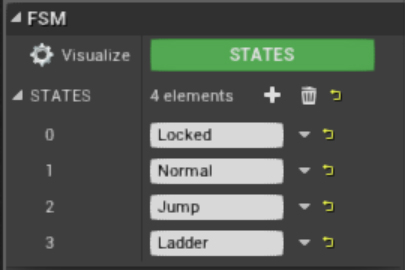
Back to FSM_Input’s ‘Class Defaults’, let’s add to the “STATES” list three new States, like these:
The States are what we will use to control different movement behaviors when our character is using an UI Inventory, moving freely or in ladder movement mode.
If you click the “Visualize STATES’ green button, you should see now something like this indicating the system understands your FSM States declarations:
So, under the ‘FSM’ section there’s an Events section; Let’s click its “+” buttons to add our ‘On Begin’, ‘On Update’, and ‘On Exit’ events.
Those events are fired by the FSM system automatically based on changes between States, so here all we have to do is react to each State to program our input behaviors.
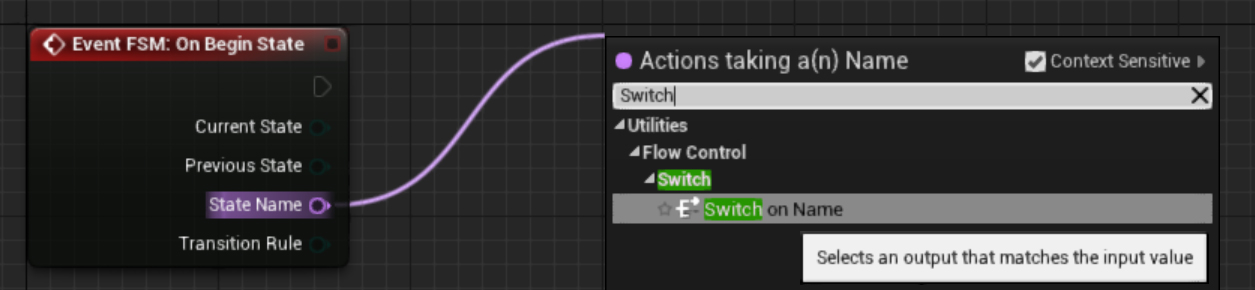
An easy and readable way to react to those State changes, is using a Switch command, so let’s use it here. We will take State by name and switch functions based on its name.
So On Begin State, in case the State that just began to run is the one we are waiting for, then we call some specific functions:
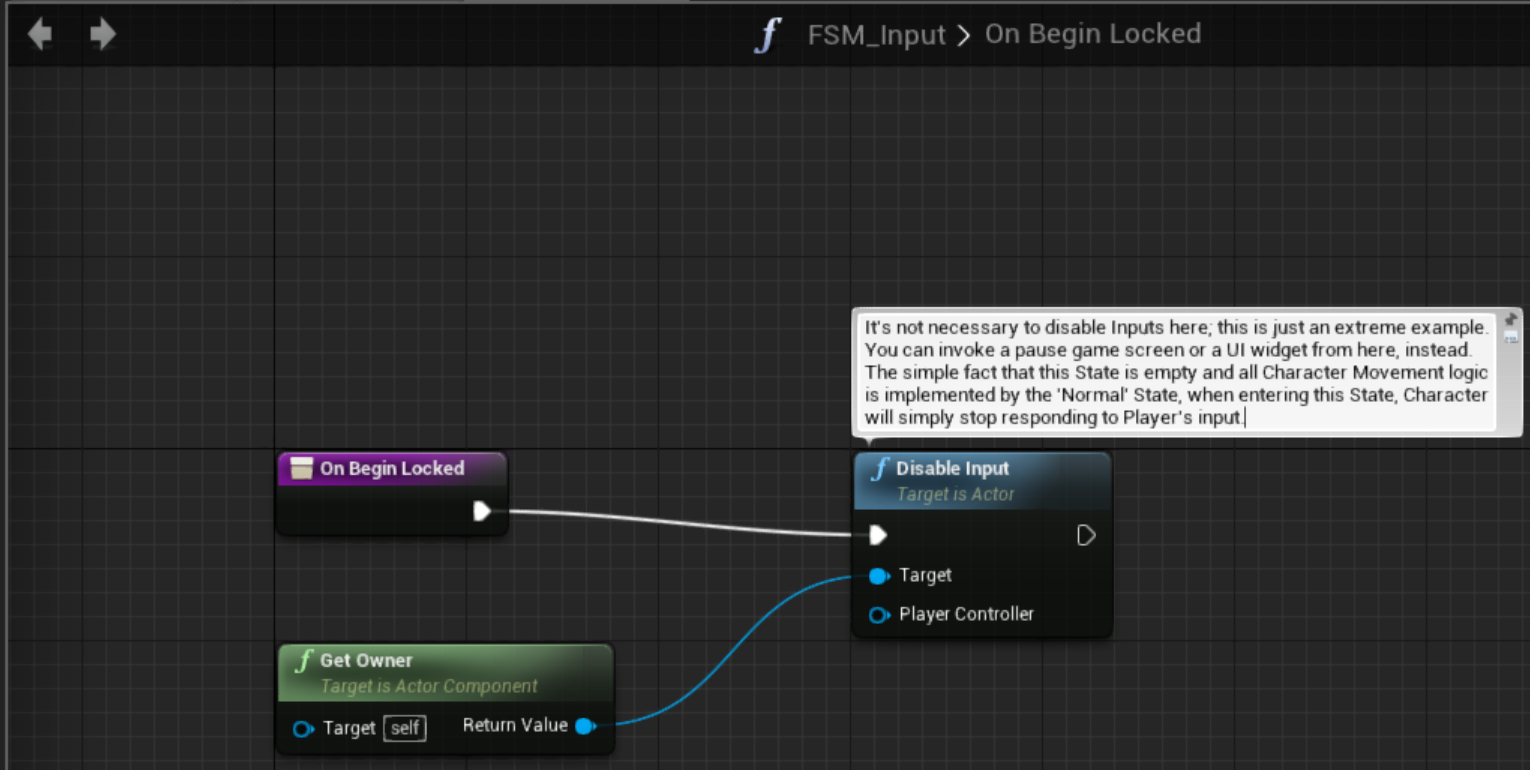
Let’s create, inside our FSM_Input’s graph, a new pair of functions; called ‘On Begin Locked’ and ‘On Exit Locked’.
Inside the On Begin, we can simply disable control inputs for now; And for the On Exit, we enable Inputs again, like this:
Assign the new functions to their lead State Events, from the main graph:
And later if we want to lock input for any reason, but still make Character receive input commands, will be as simple as setting FSM State to “Locked”.
To test that, we quickly setup a new input command for the “i” key in project settings for bindings:
In the Character Blueprint, we transfer the input signal received to the FSM_Input Component, like this:
Now to the bigger part of our graph, the ‘Normal’ State; Let’s create inside FSM_Input’s graph three new functions.
‘On Begin Normal’, ‘On Update Normal’, and ‘On Exit Normal’; then attach them to their lead State Events:
From the Character Blueprint, let’s copy its variables; ‘Base Turn Rate’ and ‘Base Look Up Rate’:
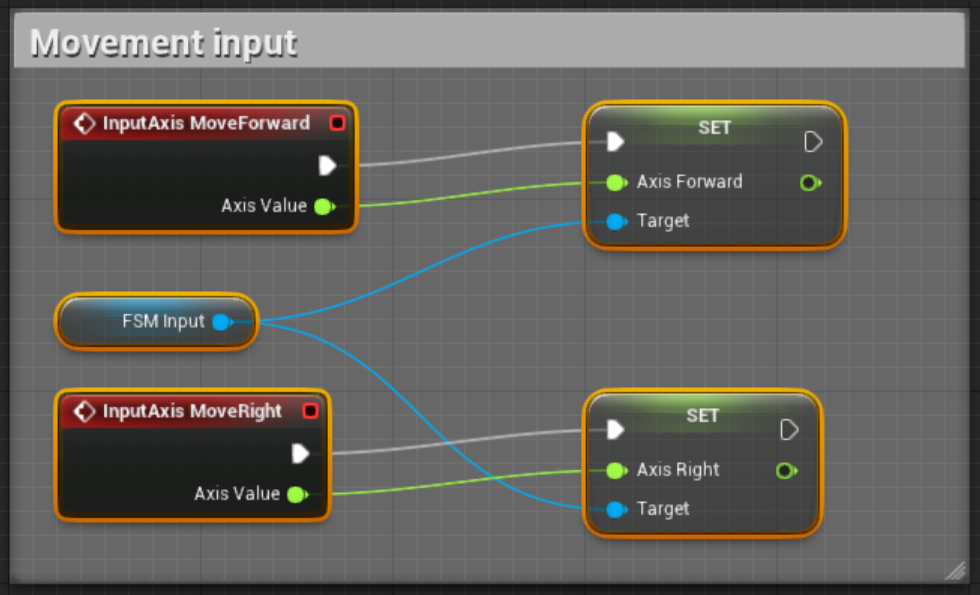
And create two new floats, ‘AxisYaw’ and ‘AxisPitch’; Also copy the ‘AxisForward’ and ‘AxisRight’ from Character Blueprint to FSM_Input.
After copying them, you can delete those from Character Blueprint, they won’t be needed there anymore; from the On Update, we get Owner, cast to our Character Blueprint then call the ‘Add Yaw Input’ and ‘Add Pitch Input’ functions:
Back to the the Character Blueprint, now its input commands are simply feeding float values to the FSM_Input component:
And then our Character Blueprint’s movement FSM is complete and isolated from external behaviors. It will only respond to walk/run commands if FSM_Input is running the ‘Normal’ State.
Now to have FSM based Jump and Double Jump methods, add a new ‘Jump’ State to the FSM list:
Then we repeat the same pattern, create a new ‘On Begin’, ‘On Update’, and ‘On Exit’ for the Jump State:
Back to our Character Blueprint, let’s change the InputAction Jump to this:
It will just tell the FSM to enter Jump State instead of calling Jump function itself. This will be useful later.
Let’s add to it also a custom event. ‘On Double Jump’ which will launch character into the air when triggered:
Implementing our ‘On Begin Jump’ State; this State will call the Character Blueprint’s Jump function and, if the character is already jumping, then it will prepare the necessary steps and allow character to perform a (bug free) double jump action:
Setup Character Blueprint and Double Jump Animation:
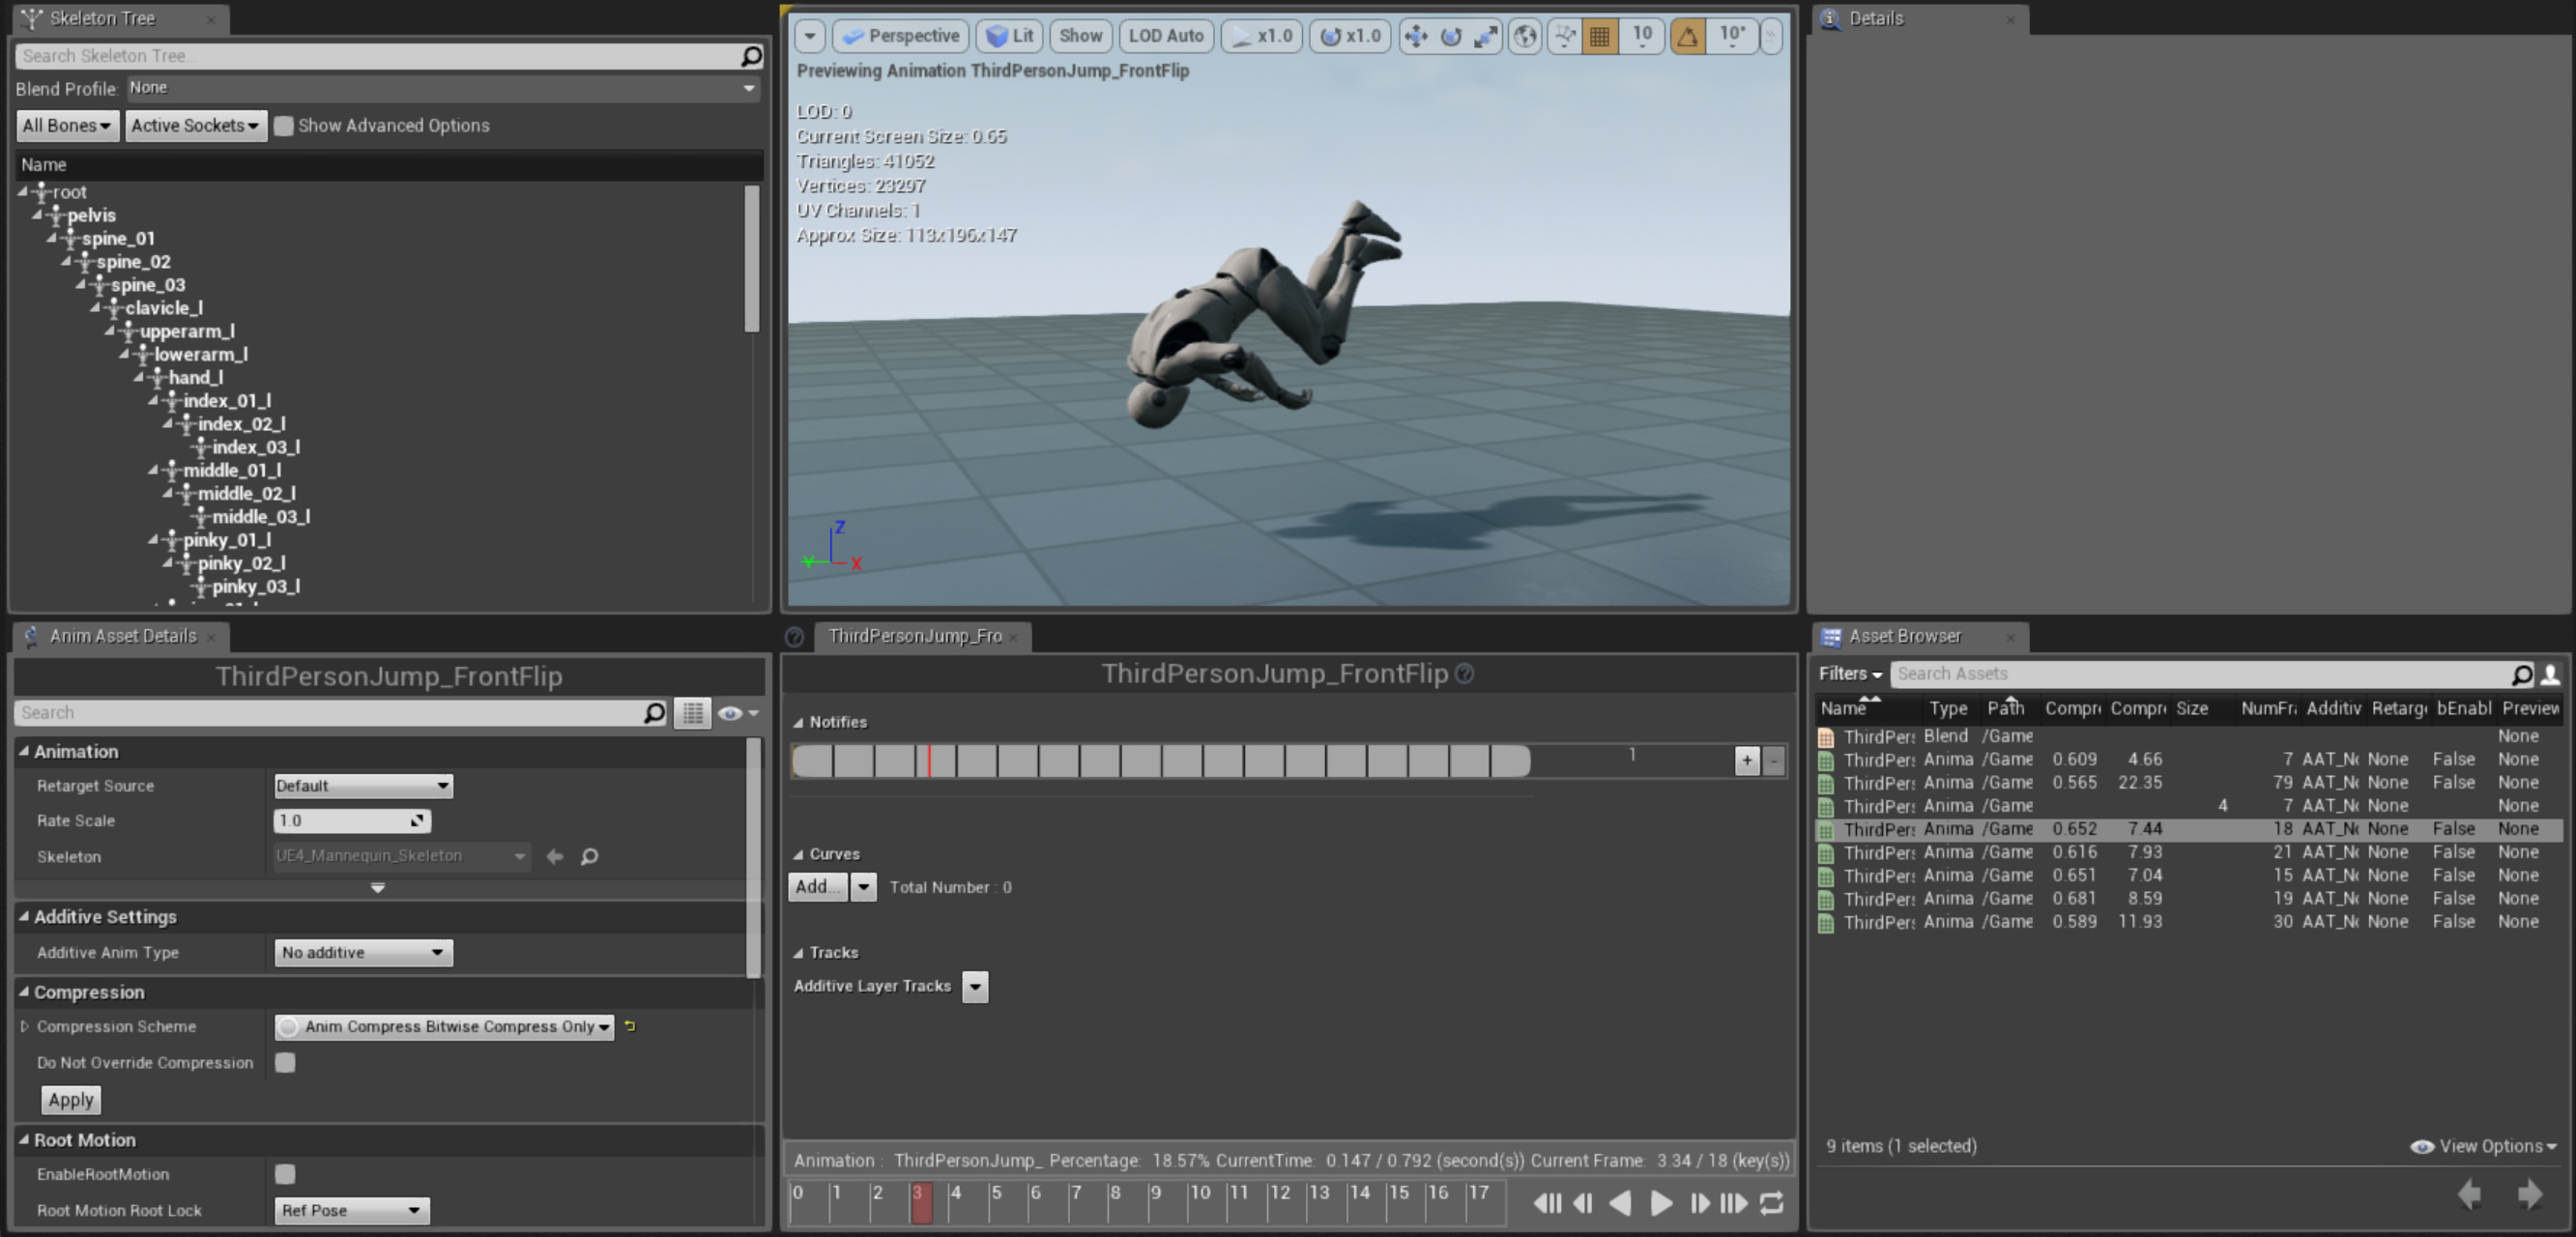
To make the double jump be more visible while testing, let’s make in a animation program (such as Maya or 3dsMax) a double jump animation and import it into the engine:
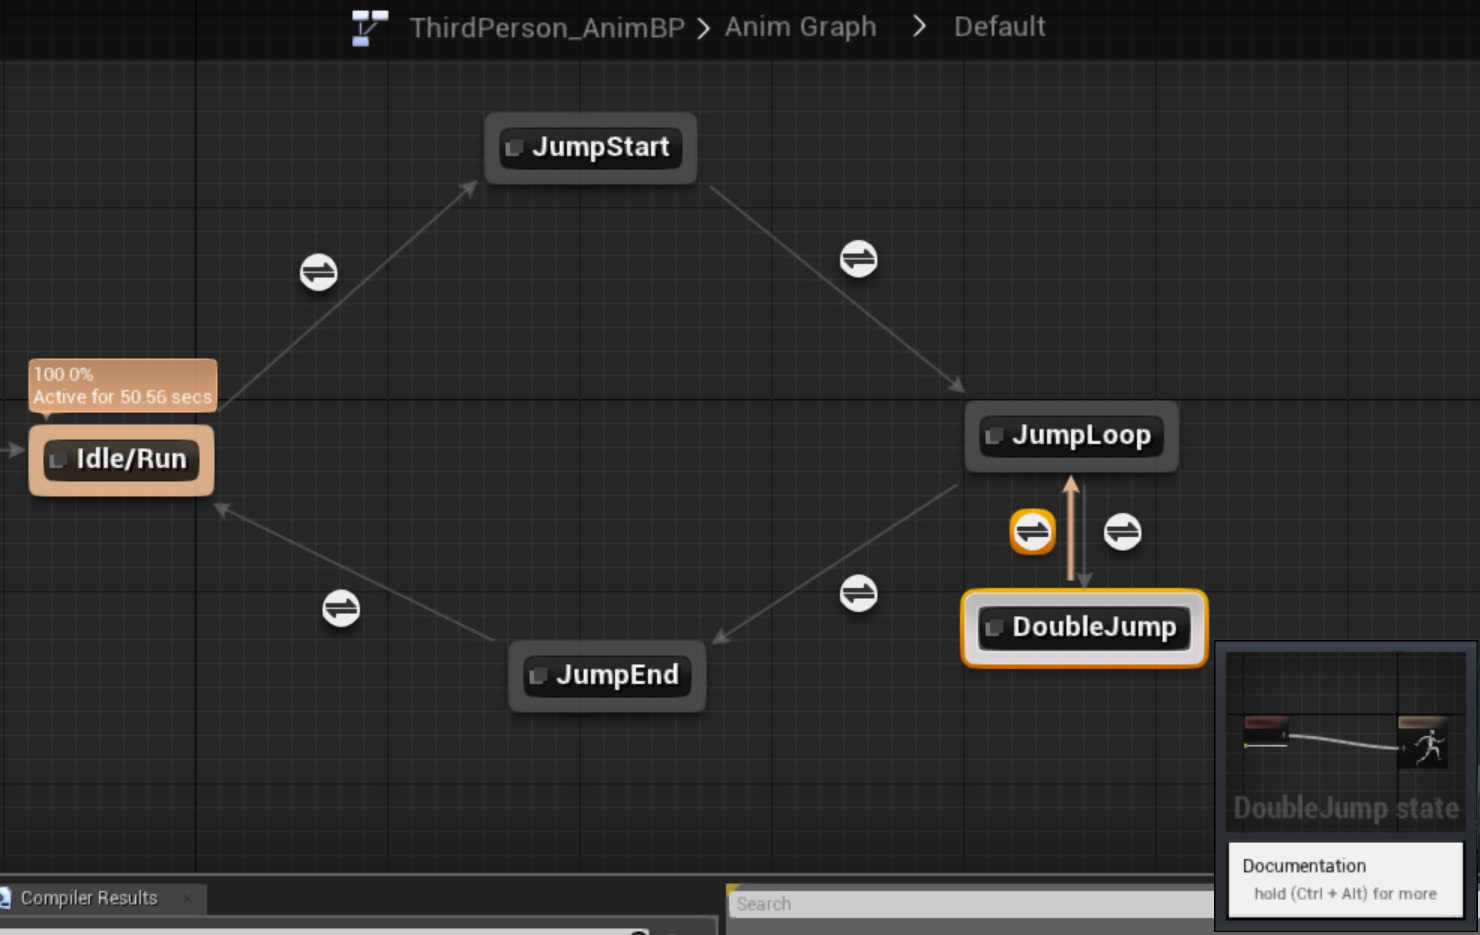
Let’s modify the default animation blueprint to include a new double jump state:
Make sure transition follows this rule:
In Animation’s DoubleJump state, set it to run the new double jump clip:
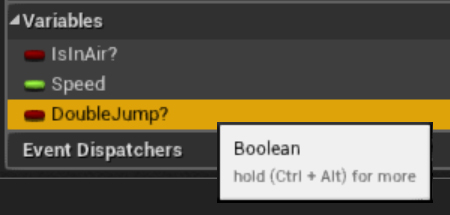
Then check for FSM_Input State in Animation’s Graph:
Back to FSM_Input, we include a ‘Double Jump’ State to the FSM and make ‘On Begin Jump’ transition to it if player is trying to jump again while already jumping:
Implementing Ladder Movement:
This is something real simple to implement when using Finite State Machines, but a lot of new UE4 game developers struggle with (mainly because they aren’t using FSMs at all).
Since we have our inputs implemented inside FSM States, to setup a ladder movement mode all we have to do is change how our character receives input when entering the ‘Ladder’ States; No boolean chains, no if then elses, just change the State.
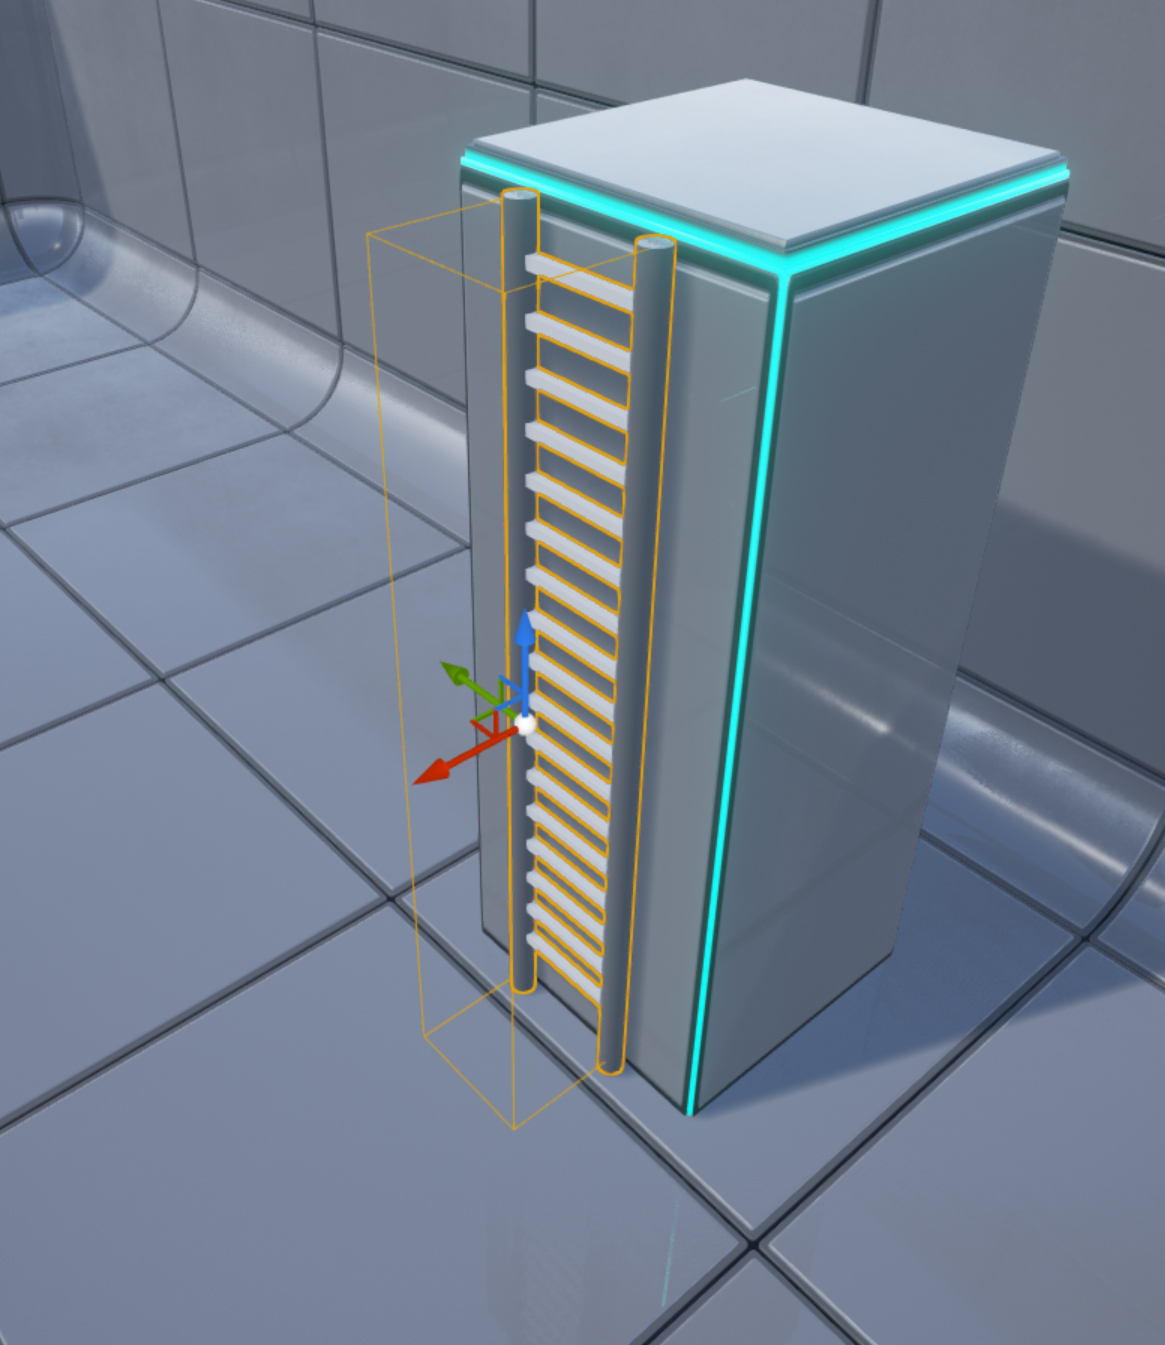
First we of course need a ladder Blueprint with a trigger volume attached to it:
In the FSM_Input Component, let’s add a new flag; it will be set by the ladder volume when Character enters it and press Jump key:
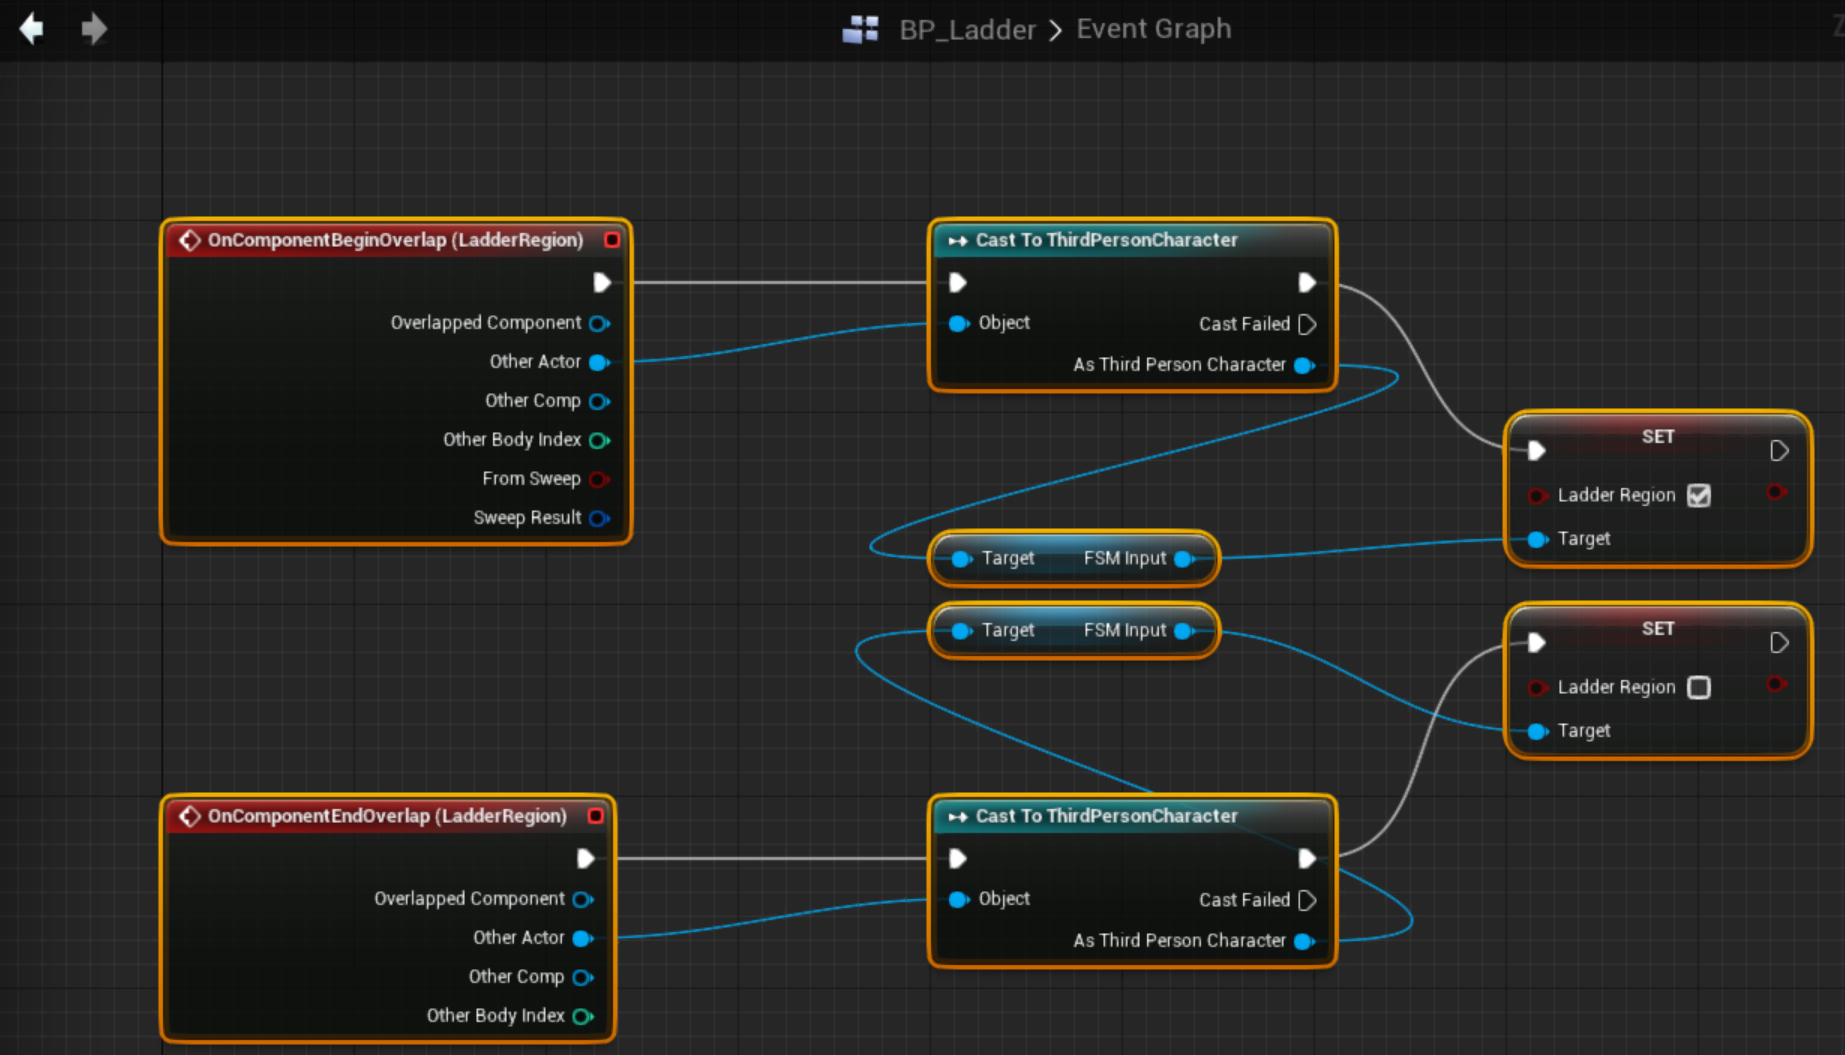
Inside the Ladder Blueprint, we setup it’s trigger to set the flag based on the fact that Character has entered or left the volume:
Back to the FSM_Input Component, we then modify the On Begin Jump function; If player is inside a ladder volume, then attach it to the ladder and change input mode else just perform a normal jump:
In the main FSM_Input’s graph, we add the functions to their lead States as well:
In the ‘On Update Ladder’ function, we do almost the same movement functions from the Normal movement, but now Character can move only up or down.
The best thing about this is the modularity of FSMs; it really will never interfere with Normal movement mode or vice-versa:
Then in our ‘On Begin Ladder’, we setup required Movement Component changes; it must be set to ‘flying’ otherwise the collision capsule will never move away from the floor:
Then in ‘On Exit Ladder’ function, we set Movement Component’s mode to ‘Walking’ again; and reset Gravity as well:
And the final result Blueprint Graphs for Character Blueprint and FSM_Input Component:
And that is it! There you have it; Walk/Run, Jump, Double Jump, Ladder climb up or down, Inventory display all with simple functions and very solid behavior!
And the more important part: No Blueprint spaghetti !!! All the graphs super clean, no wire nightmares and very little use of conditional variables 🙂
I’ve developed a new UE4 Plugin. Simple, yet powerful, Finite State Machine system which allows you to manipulate Actor States through Animation Graph’s State Machines, Behavior Tree Tasks, Blueprint Graphs, or C++ Native Code.
Finite State Machines allows for more logic encapsulation and cleaner code architecture in general, drawing systems design and debugging easier on the long run.
Some Features:
* Blueprintable Finite State Machine System.
* Blueprint Actor Component Based.
* Event-Based Tasks/Actions can be Broadcasted.
* Supports Enumerators as State ID.
* Supports Runtime State-Machine Creation/Deletion.
* Supports Runtime State-Machine Event Bindings.
* State Machines can Tick and Track Update Time.
* FSM Properties can be Replicated.
* Get/Set States from C++, Blueprints, Animation Graphs, Behavior Trees.
How to use:
* First, get the Plugin (not published yet :p) for your compatible Unreal Engine 4 version and install it. After successful installation, you’ll be able to use the FSM Component and its link interfaces. Add to your Actor a FSM Component and you’re good to go.
The Component:
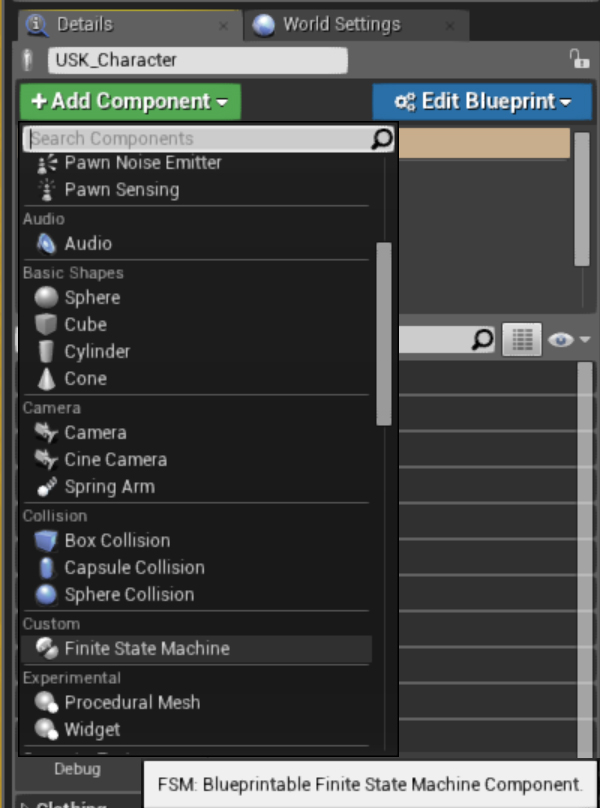
* Launch UEditor and pick an Actor which you want to use FSM with;
From the default Details panel, click ‘Add Component’ drop-down and from the ‘Custom’ group select ‘Finite State Machine’ component; Give it a name.
Blueprint Graph Usage:
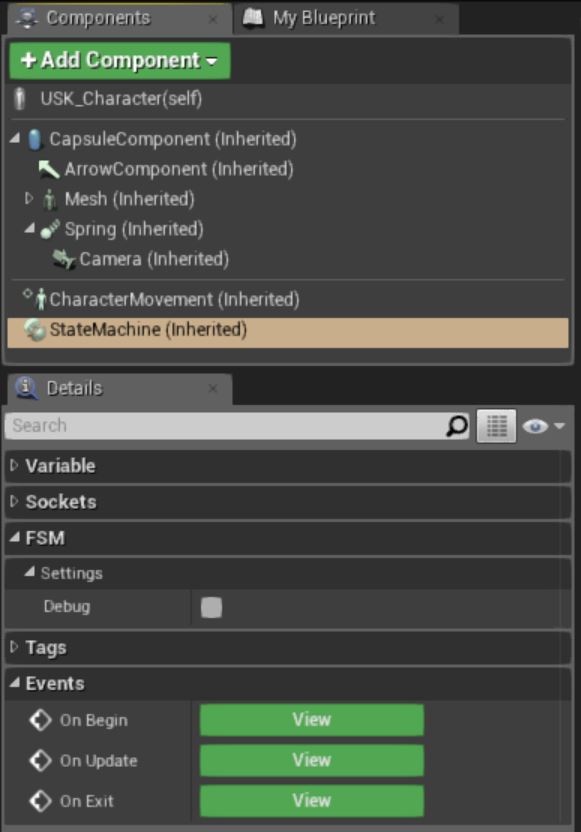
* From your Blueprint’s Graph, Component tab, select the State Machine and then you can see in Details panel under the ‘Events’ group there’s now three items: ‘On Begin’, ‘On Update’ and ‘On Exit’.
Clicking one of those Events, then you can attach Blueprint Functions to execute bound to each of them and query for current State ID or Name. The buttons adds a custom Event attached the the FSM Component, since State IDs are unsigned bytes, you can create Blueprint Enumerators and compare against IDs for good code readability.
* Blueprints that have the FSM Component attached also have access to all its Get/Set/Remove State functions as well. You can Add/Remove States any time, in running game, not just in Editor.
Animation Graph Usage:
* If you wish so, you can make a FSM Component reflect a State Machine inside an Animation Blueprint. This however applies only to Skeletal Characters.
Animation Graph’s State Machine Editor is great to setup a FSM and keep a complete visual reference of how your FSM behaves. To do so, you create an Animation Blueprint as usual for your Skeletal Asset, but instead of choosing AnimInstance as Parent Class, pick ‘StateMachineABP’.
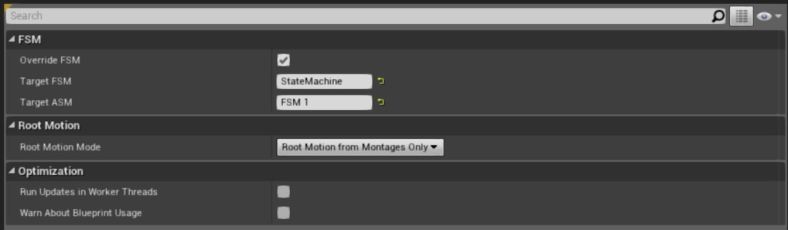
* That way your Character can set FSM States based on its Animation States while you react to State changes from your Character Blueprint easily. Once you have your new Animation Blueprint set, in ‘Class Defaults’ you can dictate which FSM Component syncs to Graph and which Animation’s State Machine you want to link.
* Once ‘Override FSM’ in Details panel is enabled, the FSM Component attached to your Character Blueprint will automatically replicate and follow the States from Animation Graph every time it changes. This requires you to use in Character Blueprint the Animation Blueprint Class you have your State-Machines, of course; But you can create multiple State-Machines inside Animation Blueprints for a variety of purposes so this doesn’t affect workflow for the actual Animation States, simply create a dull Machine for FSM Graphs without any code affecting the skeletal entity.
Behavior Trees Usage:
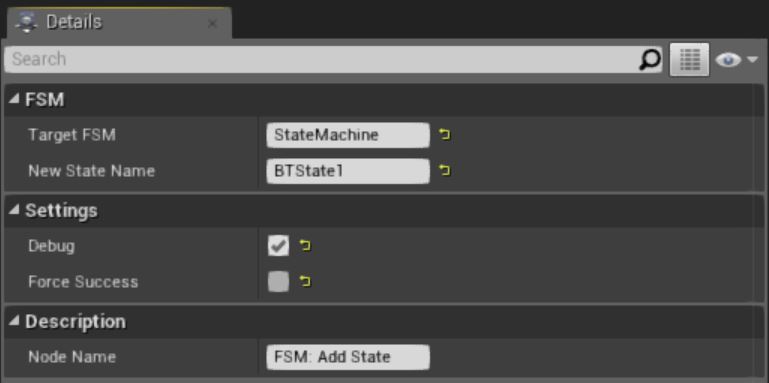
* You can also manipulate FSM States within an AI Controller’s Behavior Tree Board. Using the custom Task nodes: ‘Add State’, ‘Set State’, ‘Check State’, and ‘Remove State’, you can easily make your AI dictate FSM Component’s States based on AI decisions. This is also an awesome way to easily make your AI react to changes within an Animation Blueprint’s State or react to changes within a Character Blueprint’s Events.
Native Code Usage:
* So you are more of a C++ guy?! No problem, setting up a complex FSM within a C++ Class is as simple as creating sub-objects. An additional power you have from Native Code is you can bind Functions to FSM States, directly.
You can bind a new Function to States during runtime, or unbind Functions from it while the game is running as well. You can also easily manipulate States by State Name, State IDs or even directly compare against Enumerator types, with very simple lines of code, such as:
[At 1.3+: StateMachine->SetActive(true,false); is required to activate FSM]
C++ Character Class example, using the API from UFSM 1.6.0+ :
* With a little bit of imagination, this little tool provides unlimited possibilities! Thanks to the awesome environment provided by Epic Games and their Unreal Engine 4.
If you’re used to work with State Machines, such as Unity PlayMaker, you’ll quickly adapt to the workflow proposed by this Plugin; You can really encapsulate all code logic into Finite State rules. If you never tried FSMs before to build game logic, it will set you free of infinite spaghetti piles of code on the long run, give it a try!
I have created a variable, property, encryption system for the Unreal Engine 4’s C++ development environment.
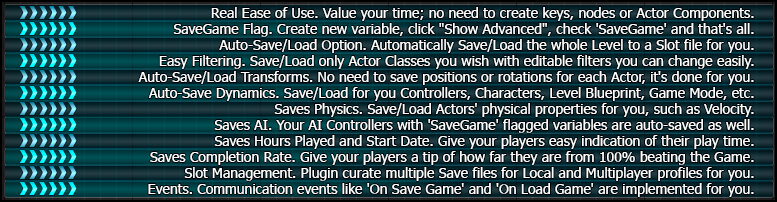
I’ve developed this Plugin for Unreal Engine 4 which automates the process of creating and managing save-game files to facilitate co-working Designers and Blueprint Scripters workflow. Its usage is simple, yet powerful.
Epic Games have featured it within a list of other super cool new plugins that are no available at their Marketplace here: https://www.unrealengine.com/marketplace/savior